
This post contains affiliate links. As an Amazon Associate I earn from qualifying purchases, at no extra cost to you.
Some thrift finds need a full rescue. These two nightstands just needed a new look.
I found this matching pair at the thrift store, and they were solid. The drawers slid well, the doors hung straight, and there was no wobble. The only problem was the style. The glossy cherry finish and brass knobs felt stuck in another decade.
With one paint color, a refreshed wood base and some new hardware, they went from dated to the kind of pieces I’d happily keep in my own bedroom. Here’s exactly how I did it.
The Before

These are classic Louis Philippe–style nightstands. Each one has a curved top drawer, a raised-panel cabinet door and a heavy bracket base. That’s great bones, but the reddish cherry finish made them feel heavy and formal.
The tops had scratches and a few small dings, and the edges of the base were worn. The antique brass knobs were tiny and easy to miss. Nothing was broken. They just needed a style update.
Why this is a great thrift flip: a piece like this is solid and structurally sound, with lots of detail in the molding. Paint shows off that detail instead of hiding it.
Supplies I Used
Prep
- Degreasing cleaner: Krud Kutter – Shop on Amazon
- Sanding supplies: 120 and 150 grit sandpaper, plus 400-grit sanding sponges – Shop on Amazon
- Green painter’s tape – Shop on Amazon
Paint and finish
- Sherwin-Williams Gallery Series cabinet paint (bought in store)
- Primer: Stix – Shop on Amazon
- Topcoat: General Finishes – Shop on Amazon
- Wagner Earlex 6700 sprayer – Shop on Amazon
Finishing touches
- Matte black knobs – Shop on Amazon
- Botanical drawer liner – Shop on Amazon
Styling (similar items on Amazon)
- Golden pothos – Shop on Amazon
- Black bookends – Shop on Amazon
- Black metal desk lamp – Shop on Amazon
How I Did It
1. Remove hardware and clean. I took off the knobs and hinges and scrubbed everything with a degreaser. Old furniture carries years of hand oils and polish, and paint won’t stick to that.
2. Scuff sand. You don’t need to strip a piece like this. I scuff-sanded the glossy finish so the primer and paint had something to grip. I sanded the base down further because I planned to keep it wood-toned.

3. Mask the inside. I didn’t want paint on the cabinet interior, so I taped it off and covered the opening with masking film. It takes ten minutes and saves a lot of cleanup.
4. Prime. Reddish cherry and mahogany finishes are known for bleeding through light paint, so a stain-blocking primer was used.
5. Paint. I used Sherwin-Williams Gallery Series cabinet paint. I sprayed 3 thin coats with my Wagner Earlex sprayer, letting each one dry fully. Thin coats level out better and avoid drips in all that molding.
6. Refresh the base. Instead of painting everything, I left the bracket base in a warm wood tone. I applied a paint wash to achieve the desired color. This two-tone look keeps the piece grounded, and the warm wood pairs beautifully with green.
7. Seal. The base was sealed with flat polyurethane. The Sherwin-Williams paint has a topcoat built in, and applying three thin coats ensures good coverage and durability.
8. New hardware and liner. The final step is the fun part. I added matte black knobs and lined the drawer with a botanical print liner.
The After

What a difference! The muted green feels calm and modern, and it makes all that curved molding stand out. The wood base adds warmth, and the black knobs give it a crisp, finished edge.


My favorite surprise is the drawer. I lined it with a soft botanical print, so you get a little moment every time you open it.

Styling It with Plants
To stage the pair, I kept it simple: books in black bookends on one side, and a black lamp with a small pothos on the other. Pothos is one of the easiest houseplants there is. It handles lower light and trails nicely as it grows, and its bright leaves pop against the green paint. I set mine in a glass bubble vase so the roots show, which adds an interesting detail on a nightstand.
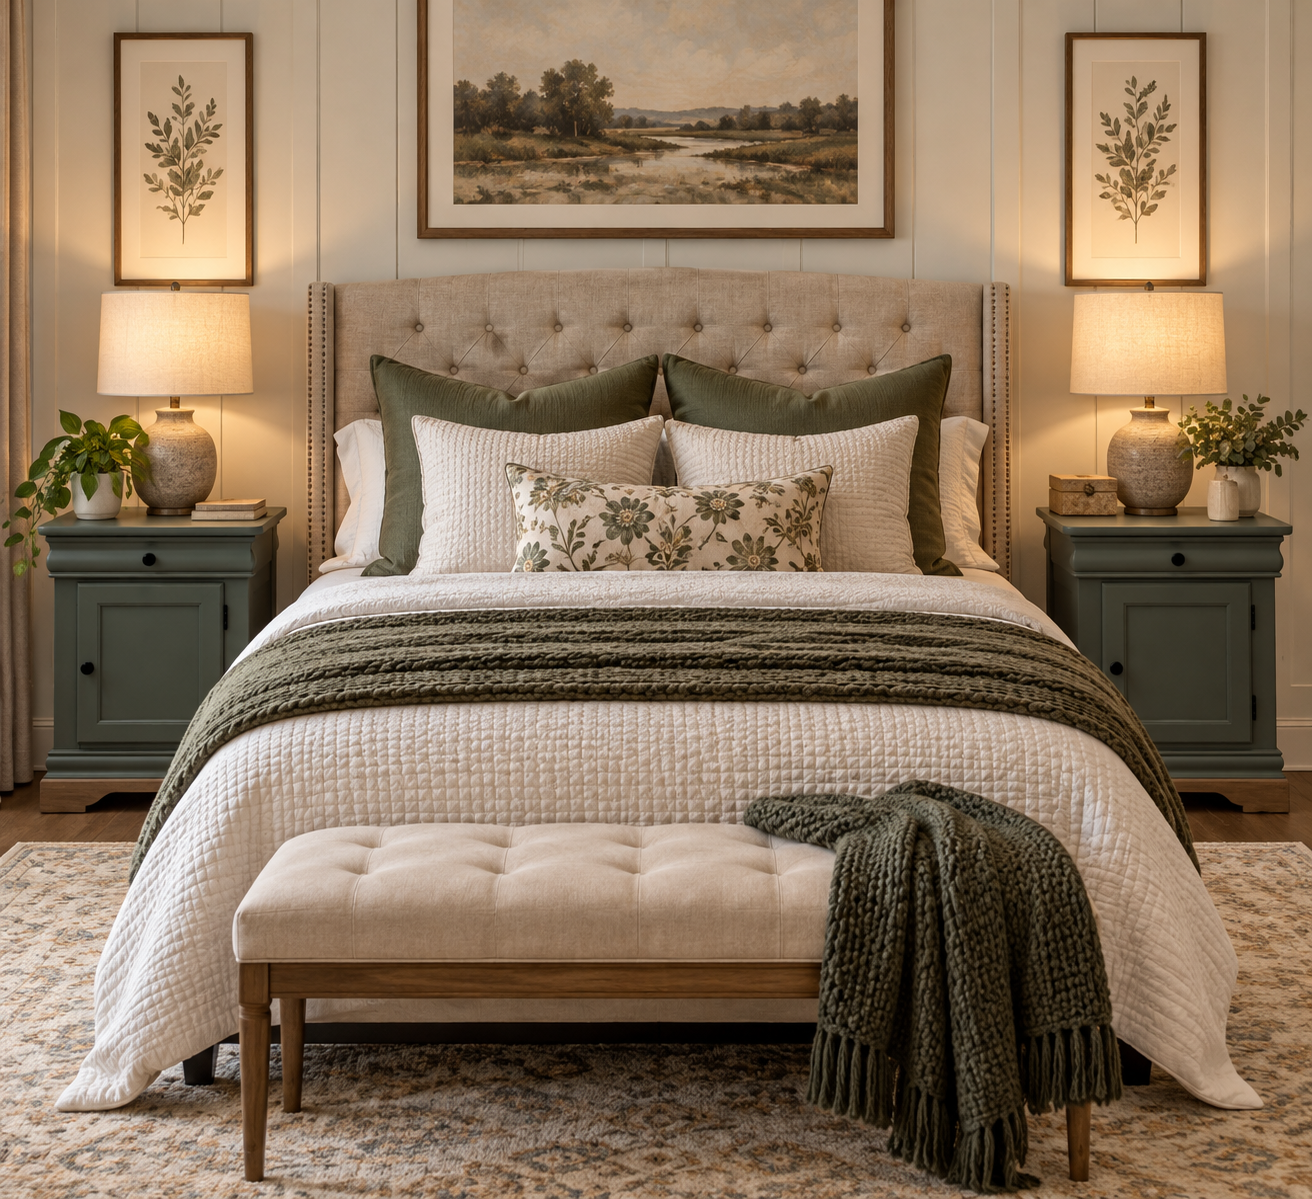
I have also included an AI-generated photo for inspiration, showing how these nightstands can enhance the look of a bedroom when paired with coordinating decor.

AI-generated staging for inspiration. The nightstands are real; the room is not.
Shop the Look
The green nightstands anchor a warm, layered palette of cream, sage and olive with natural wood. Here’s how to get a similar look with products on Amazon:
- Tufted linen wingback headboard
- Quilted coverlet and euro shams
- Olive green pillow shams
- Green floral lumbar pillow
- Olive throw blanket
- Tufted upholstered bench with wood legs
- Textured ceramic table lamps with linen shades
- Framed botanical leaf prints
- Vintage-style area rug
- Pothos
- Vintage 6″ planter for pothos
Tip: Repeat your nightstand color in two or three soft pieces (pillows and a throw here) so the room feels pulled together, not matchy.
Final Thoughts
If you spot a solid piece in a style you don’t love, look past the finish. Good bones plus a little paint can make it feel brand new. Check the supply list above for everything I used, and save this post to Pinterest for your next thrift flip!
Thrifted & Thriving
Leave a Reply